How to Start Real-Time Translation #
Once you’ve logged in to Transync AI, you can begin real-time translation in just a few steps. Follow this guide to choose the right translation mode, set up language pairs, confirm audio input, and manage your translation session efficiently. If you are not sure which mode to use, see How to Choose a Translation Mode in Transync AI before starting.
1. Choose Your Translation Mode #
Before choosing languages, select the translation mode that matches your scenario: One-way Translation, Two-way Translation, or Multilingual Translation. In the app, these options may appear as One way, Two way, and Multilingual.
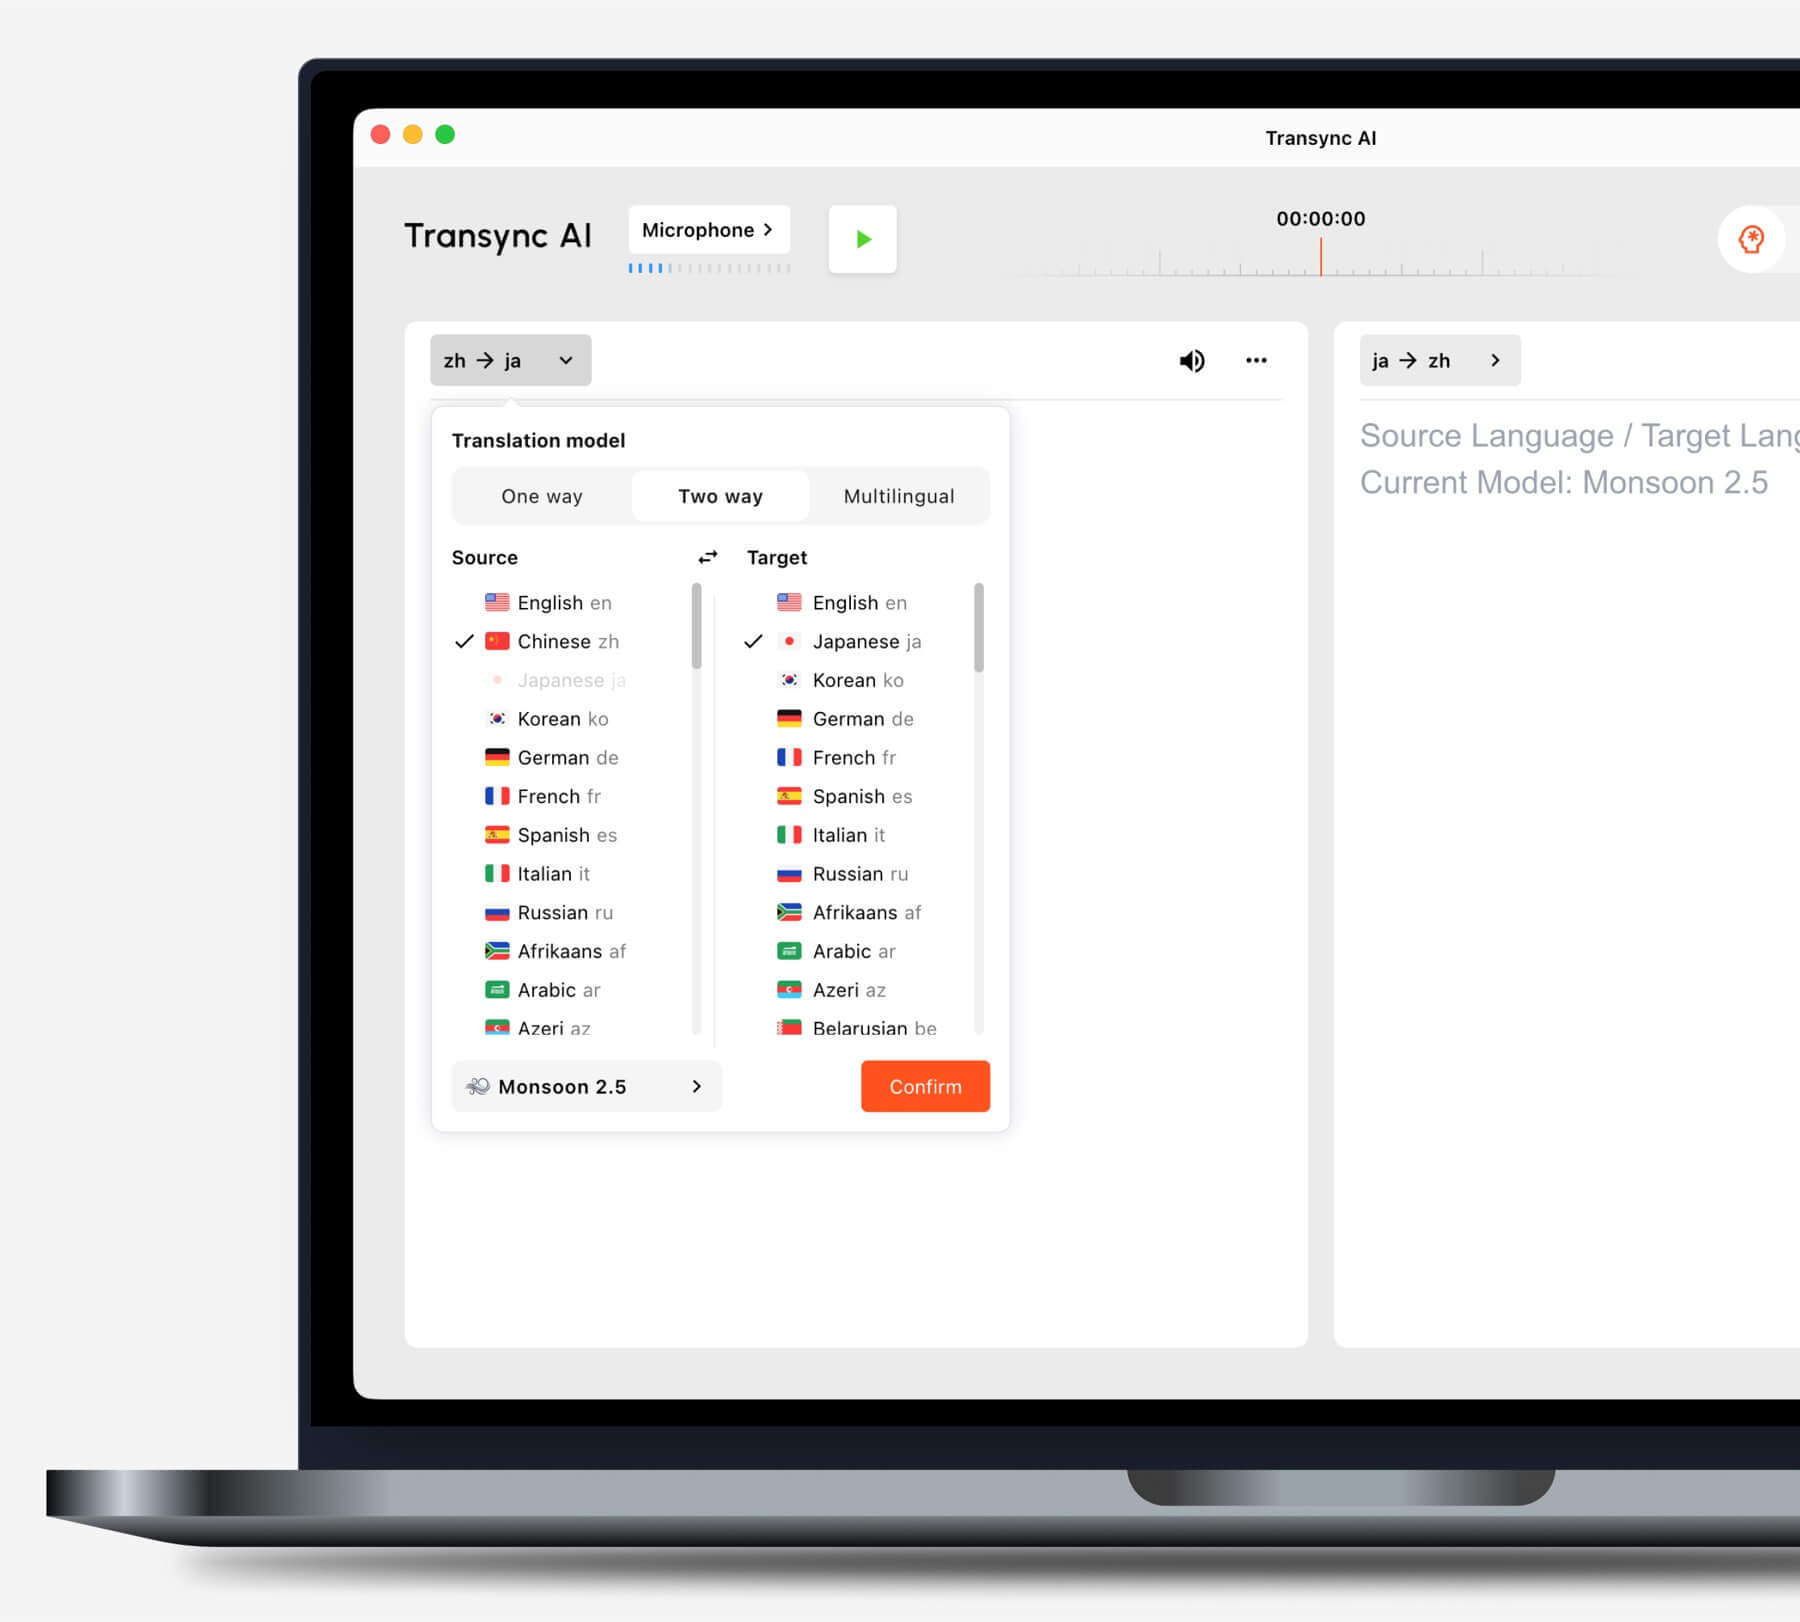
Use One-way Translation for listening scenarios such as classes, lectures, and webinars. Use Two-way Translation for conversations and meetings. Use Multilingual Translation when one task needs several target languages. For the full comparison and billing rules, read How to Choose a Translation Mode in Transync AI.
2. Confirm Your Language Pair #
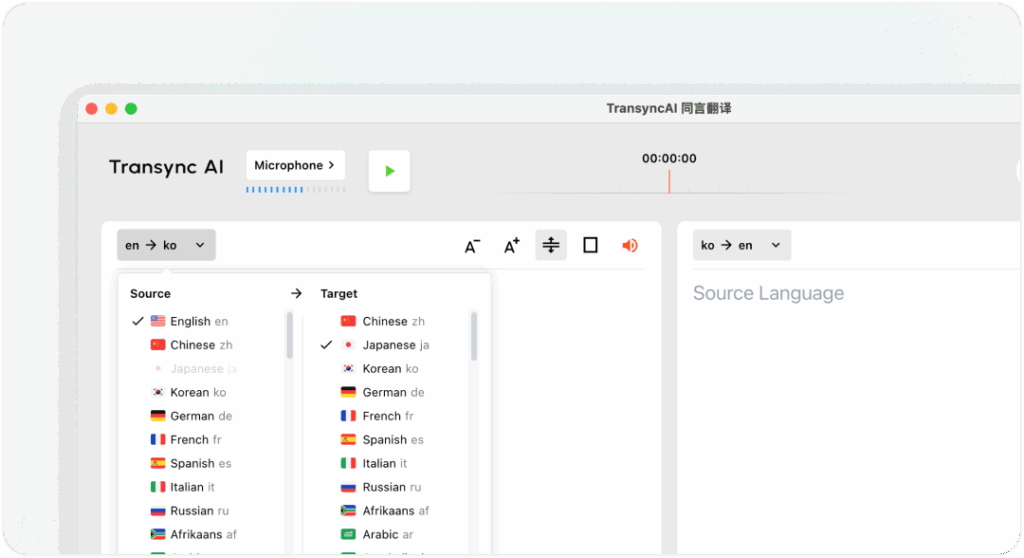
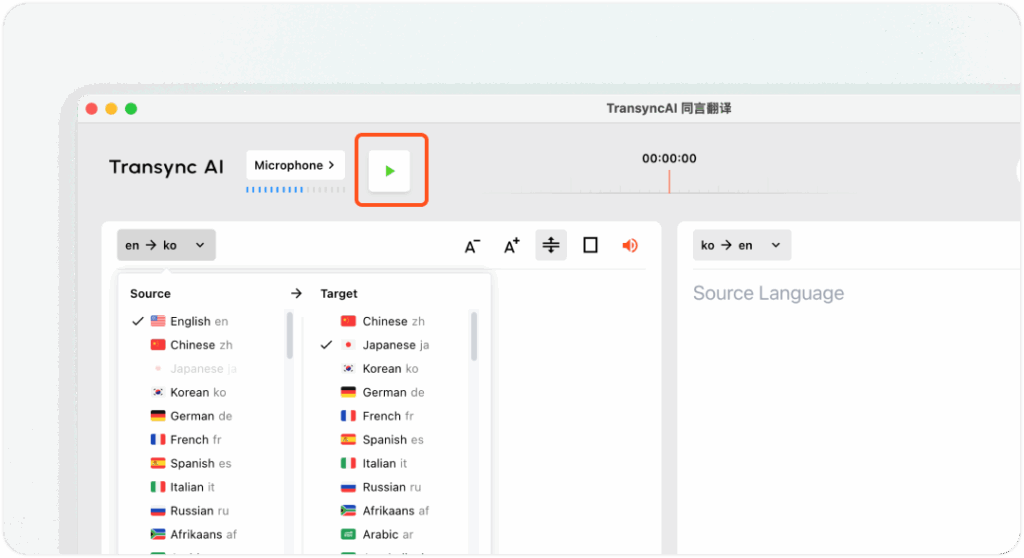
At the top of the main interface, select your source and target languages — for example, English ↔ Japanese or Chinese ↔ English.
Choosing the correct language pair ensures accurate and natural translation output. You can also learn more about the features of real-time translation
3. Choose the Right Translation Model #
Before starting translation, choose the model that best fits your scenario.
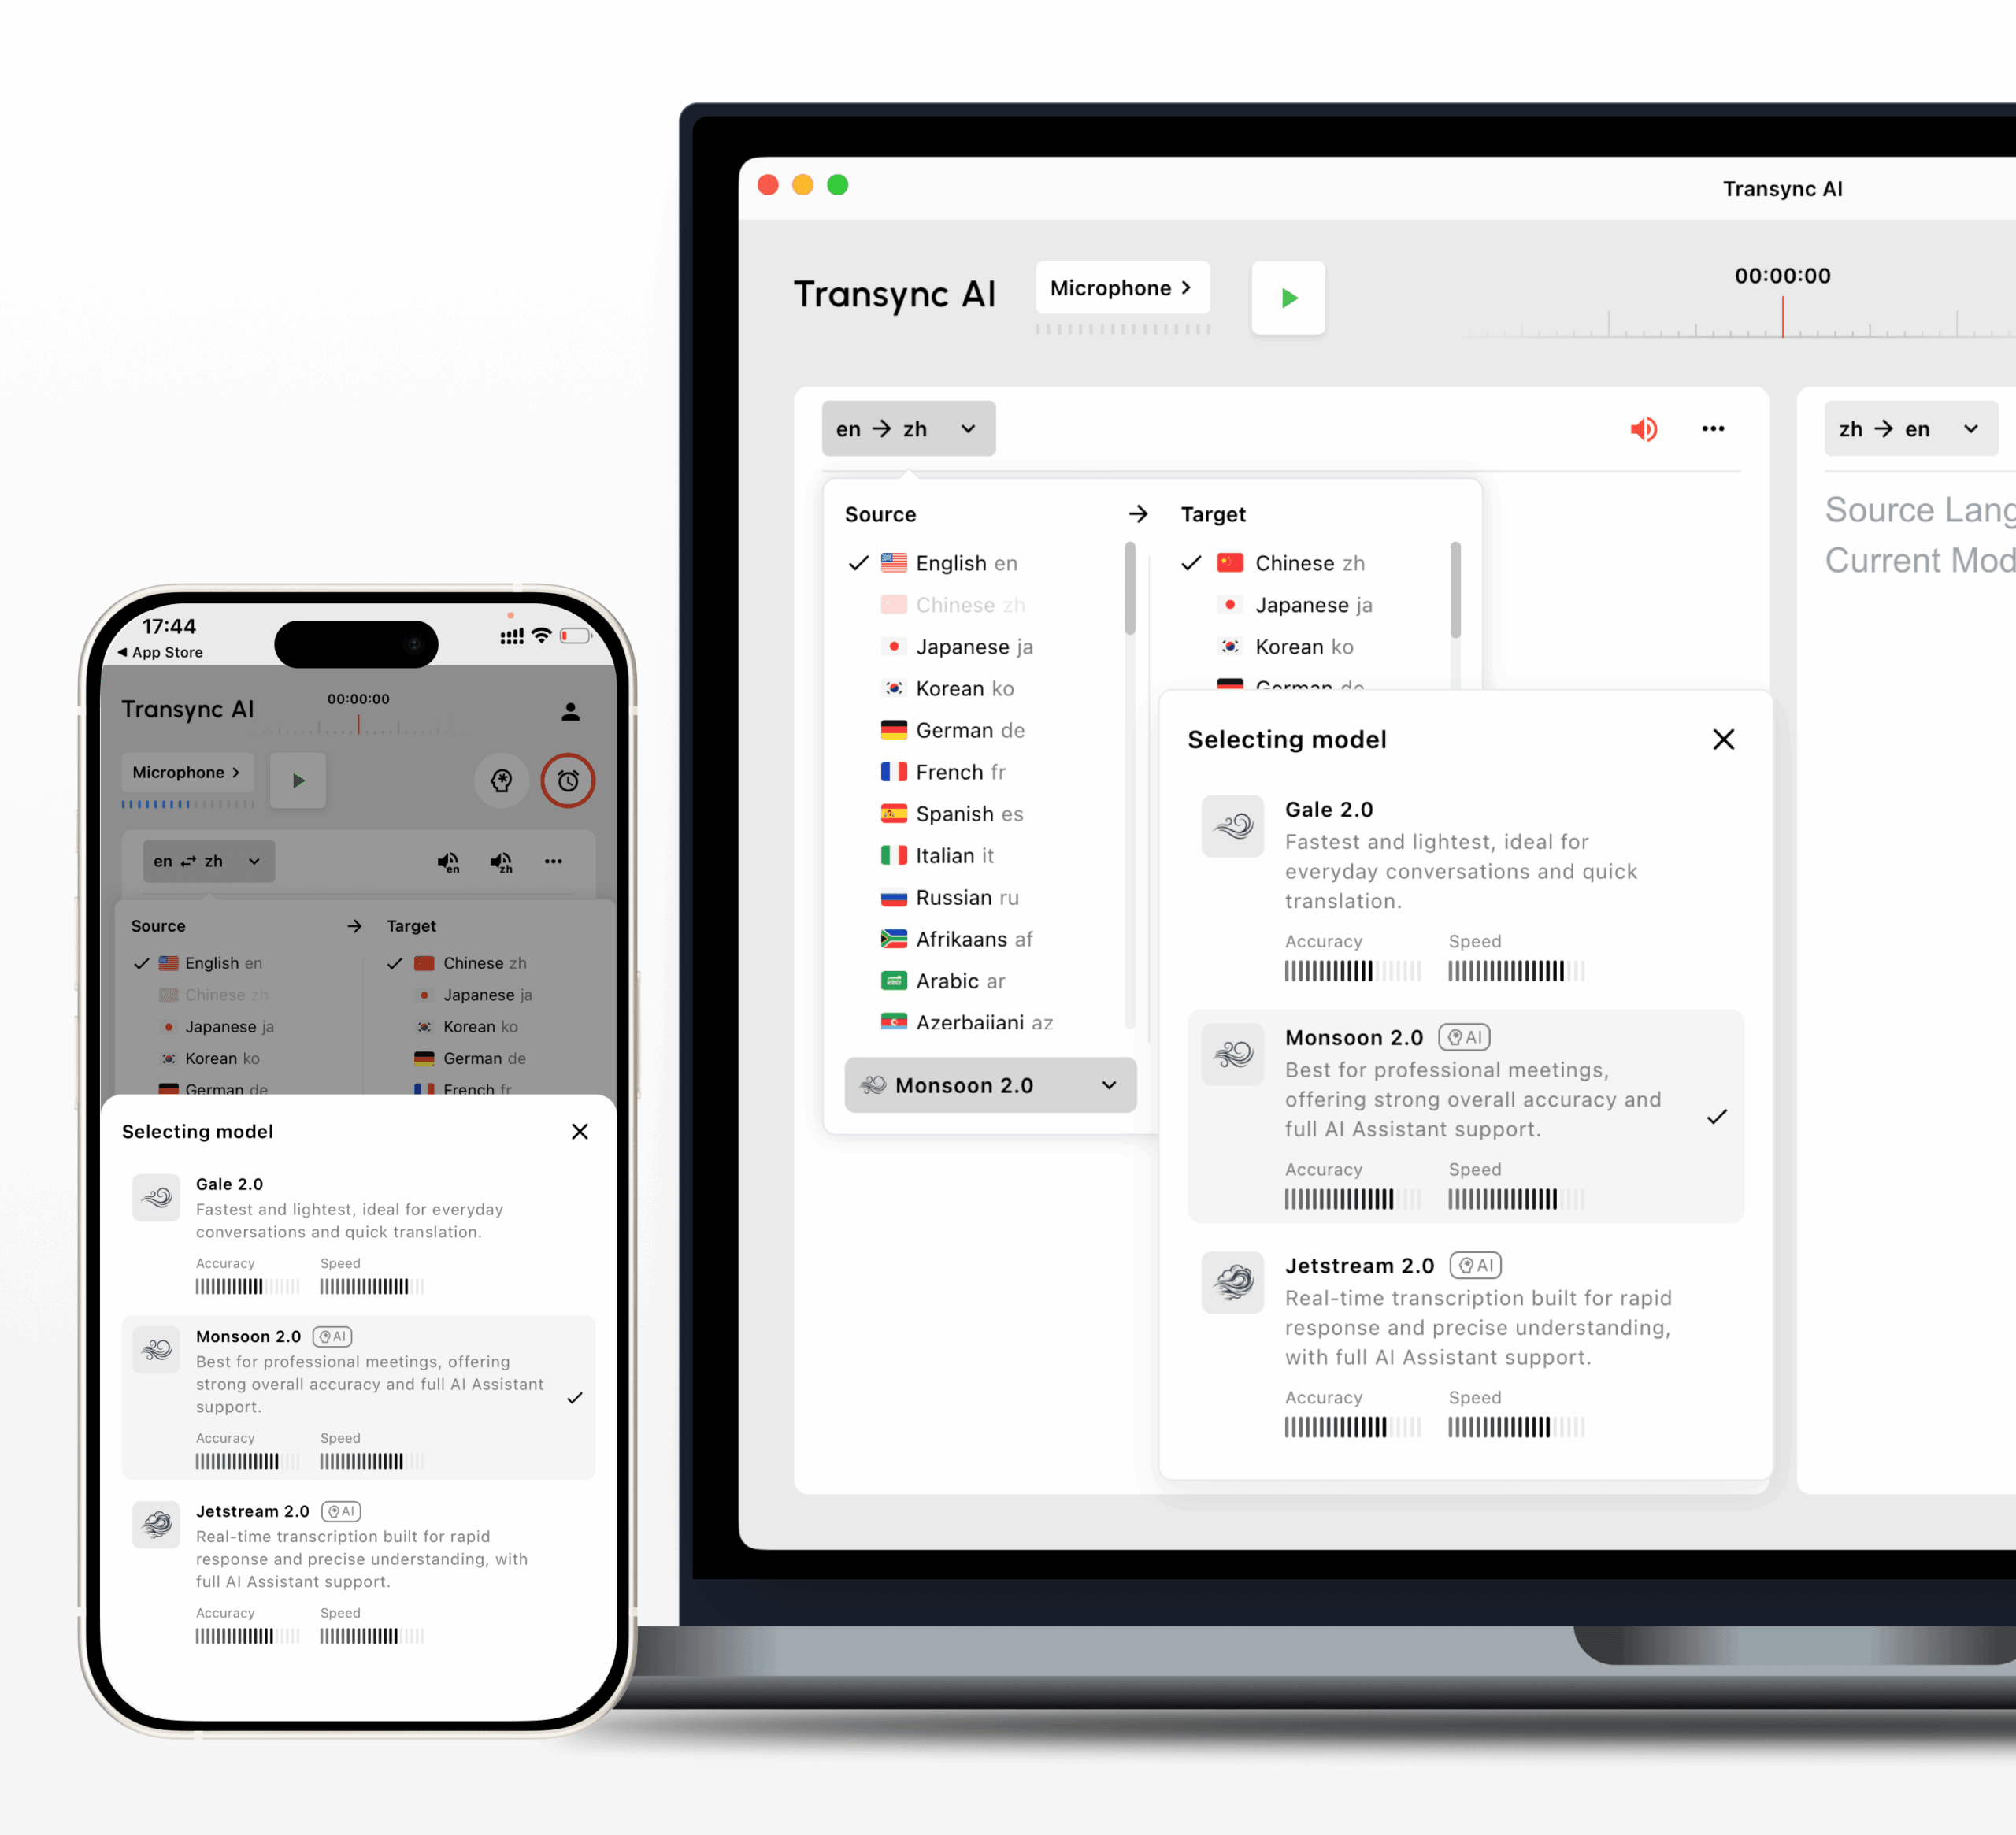
 Monsoon 2.0
 Jetstream 2.0
 Gale 2.0
For most users, Monsoon 2.0 is the recommended default model. It provides the best overall accuracy and speed, supports 60+ languages, and works with AI Assistant keywords and context. Use Jetstream 2.0 when your network connection is less stable. Use Gale 2.0 if you are in Mainland China and need faster response, but note that Gale 2.0 does not support AI Assistant keywords and context.
4. Check Your Audio Input #
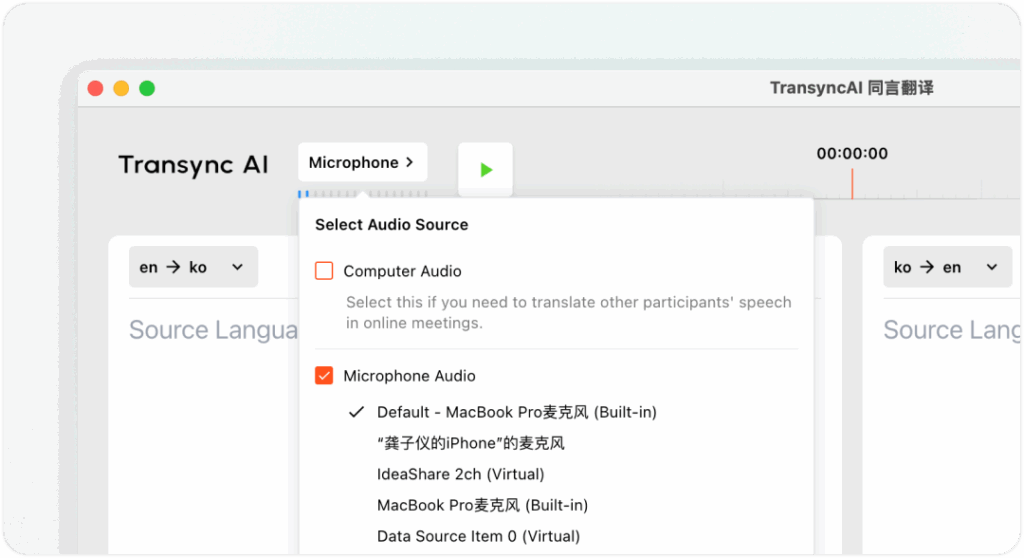
Before starting, confirm that your audio sources are correctly selected:
- Microphone: Captures your own speech. Generally, it is necessary to check.
- Computer Audio: Captures other participants’ voices from your meeting platform (Zoom, Teams, etc.)or video platform(Youtube, etc.). Both can be enabled simultaneously for full meeting translation. learn more how to share computer audio
5. Enable Voice Broadcast (Optional) #
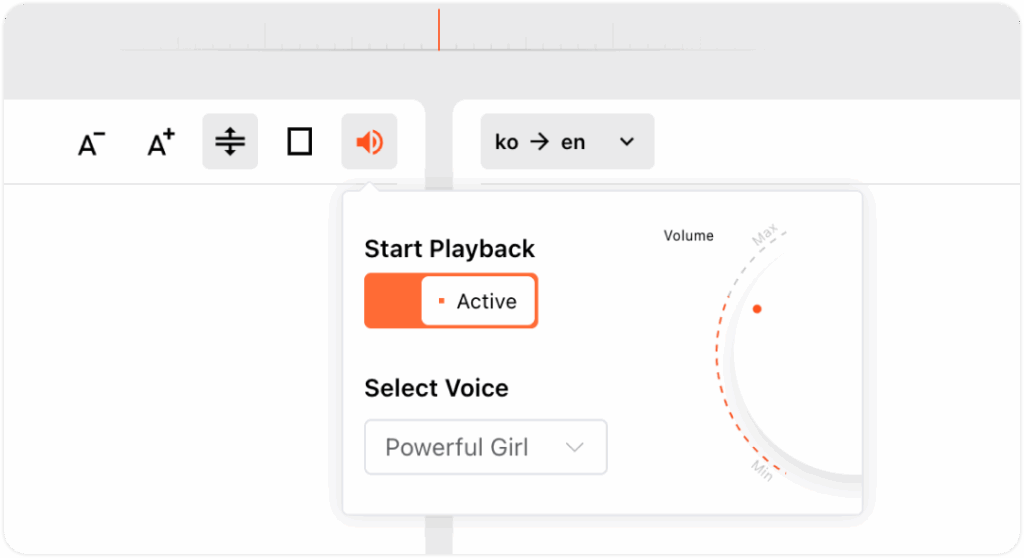
To make translated speech audible to others, toggle on Voice Broadcast in the upper-right corner of the translation panel.
You can adjust the volume of the sound output and choose your preferred tone. When enabling voice broadcasting, we recommend using external speakers on your computer.
6. Start, Pause, and Stop Translation #
- Click Start Translation to begin real-time translation.
- Use Pause when you temporarily don’t need translation — paused time will not consume your translation quota.
- Click Stop to end the session. After stopping, the original transcript and translations will be saved automatically, allowing you to generate a summary or export meeting notes later.
7. More Settings and Customization #
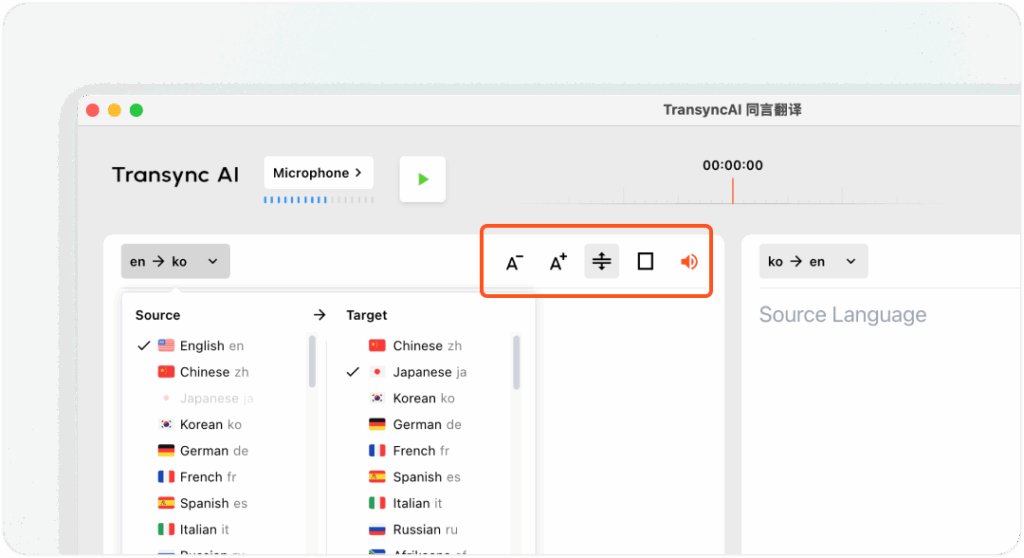
- Font Size: Adjust text size for better readability during long sessions.
- Display Mode: Switch between Show Both or Show Translation Only depending on your preference.
- Translation Mode: Choose One way, Two way, or Multilingual before starting the session. Multilingual Translation may consume time based on the number of selected languages. See How to Choose a Translation Mode in Transync AI for mode details and billing rules.
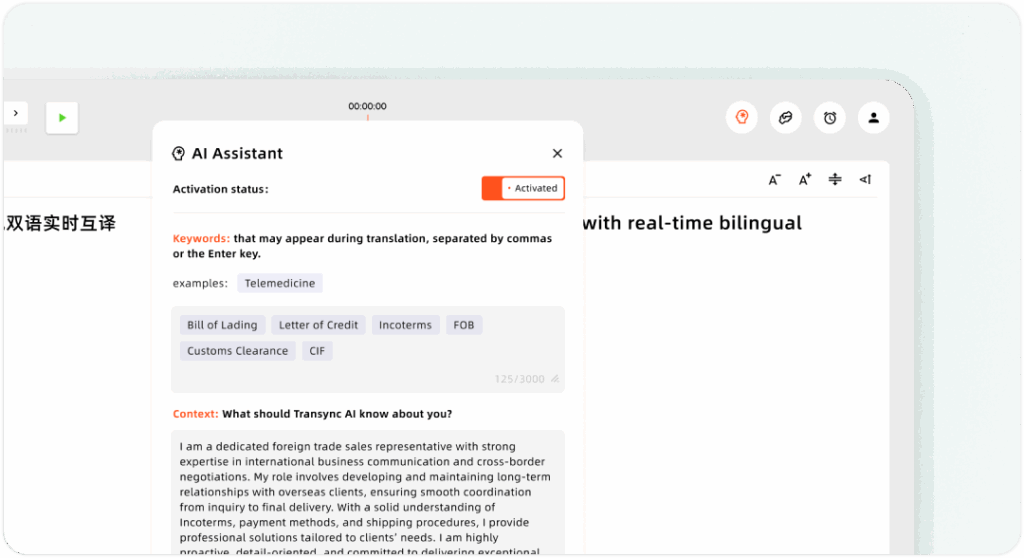
8. Set Up the AI Assistant #
You can enhance translation accuracy by configuring the AI Assistant before starting a session:
- Keywords: Add industry terms, brand names, or personal names to ensure consistent and precise translation.
- Context: Provide details such as your profession, background, and meeting topic. This helps Transync AI better understand your communication scenario and produce more accurate, context-aware translations.