This desktop quickstart guide helps you set up Transync AI for AI real-time translation on macOS, Windows, and desktop web workflows. It is designed for users who care about AI meeting translation, meeting audio, translated voice output, voice cloning, Picture-in-Picture subtitles, and sharing translated speech with other participants.
If this is your first time using Transync AI, start by installing the app from the Download page and then creating an account. For a basic walkthrough of starting a translation session, see How to Start Real-Time Translation
Before you start #
- Use the Transync AI desktop app when you need the most complete meeting translation setup, especially system audio, voice playback, virtual microphone, and PiP.
- Use the Transync AI web version when you mainly translate browser-based meetings, online videos, or web workflows.
- Set up Transync AI before joining or starting the meeting so the translation mode, language pair, audio sources, and optional features are ready.
- Make sure your meeting app, browser, microphone, and speaker permissions are enabled before the call.
1. Choose your translation mode #
Before selecting languages, choose the translation mode that matches your scenario: One-way Translation for listening, Two-way Translation for conversations, or Multilingual Translation when one task needs multiple target languages.

For the full mode comparison, see How to Choose a Translation Mode in Transync AI.
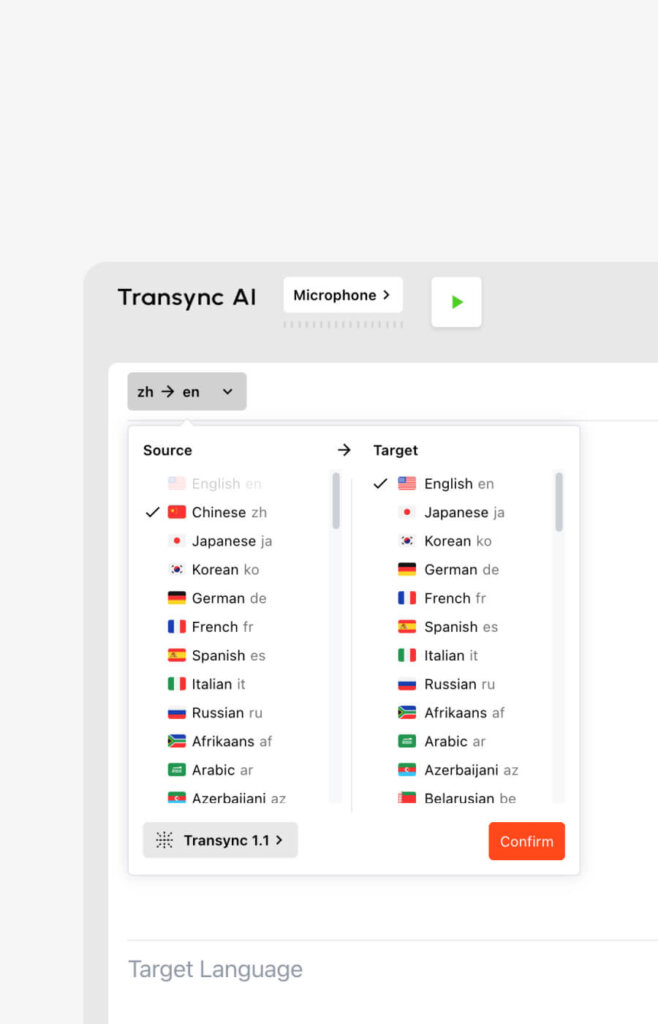
2. Choose your languages #
After choosing the translation mode, select the source and target languages you need, such as English to Japanese, Chinese to English, or Spanish to English. Choose the language direction based on what you want to hear, read, or send into the meeting.
For the basic translation controls, follow the step-by-step guide in How to Start Real-Time Translation
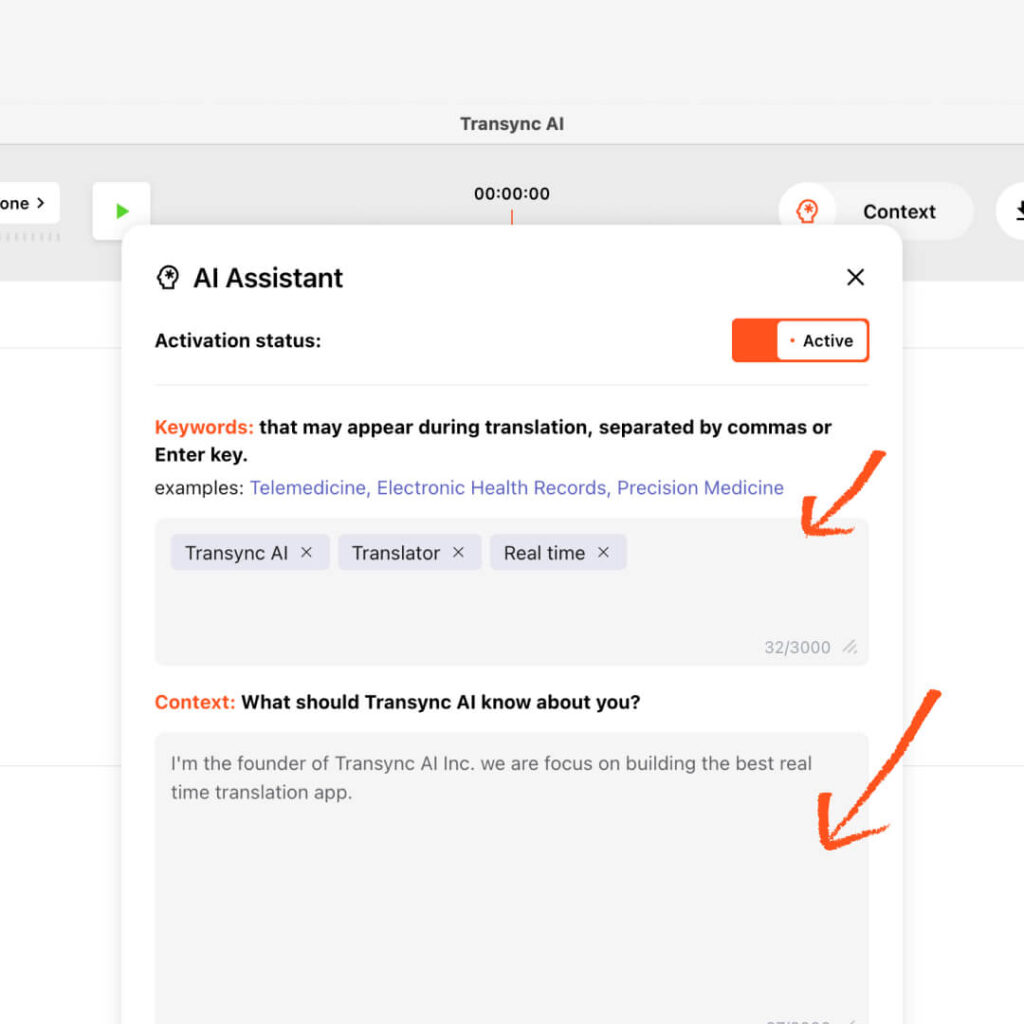
3. Add AI Assistant keywords and context #
Before starting translation, open AI Assistant to add keywords and context for your session. This helps Transync AI understand your professional field, meeting background, names, acronyms, and technical terms before the real-time translation begins.
- Use Keywords for special terms, names, product names, company names, or technical phrases.
- Use Context to describe your industry, meeting topic, role, or conversation background.
- If a keyword should translate into a specific target term, connect the two words with an equal sign.
- For detailed setup, see How to Use the AI Assistant
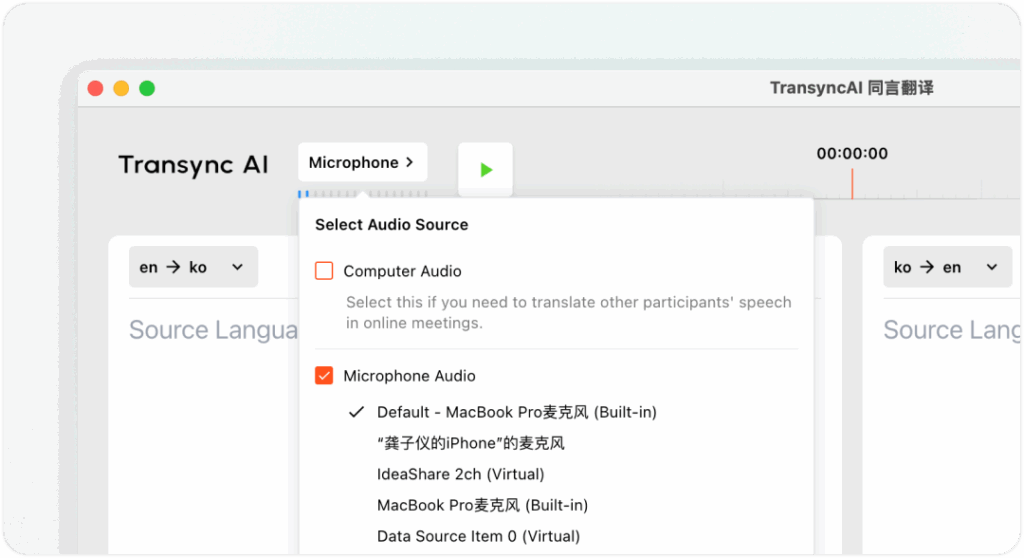
4. Configure microphone and computer audio #
Set up your audio sources before joining the meeting. Transync AI can translate your own microphone audio and the audio coming from your computer, so the AI meeting translator can follow both your speech and the other side of the conversation.
- Microphone Audio captures your own speech.
- Computer Audio captures voices, videos, or meeting sound playing on your computer.
- For a full setup guide, see How to Share Computer Audio
If you are using the web version, browser audio sharing may depend on the browser tab or meeting platform. When possible, use the desktop app for more flexible meeting audio capture.
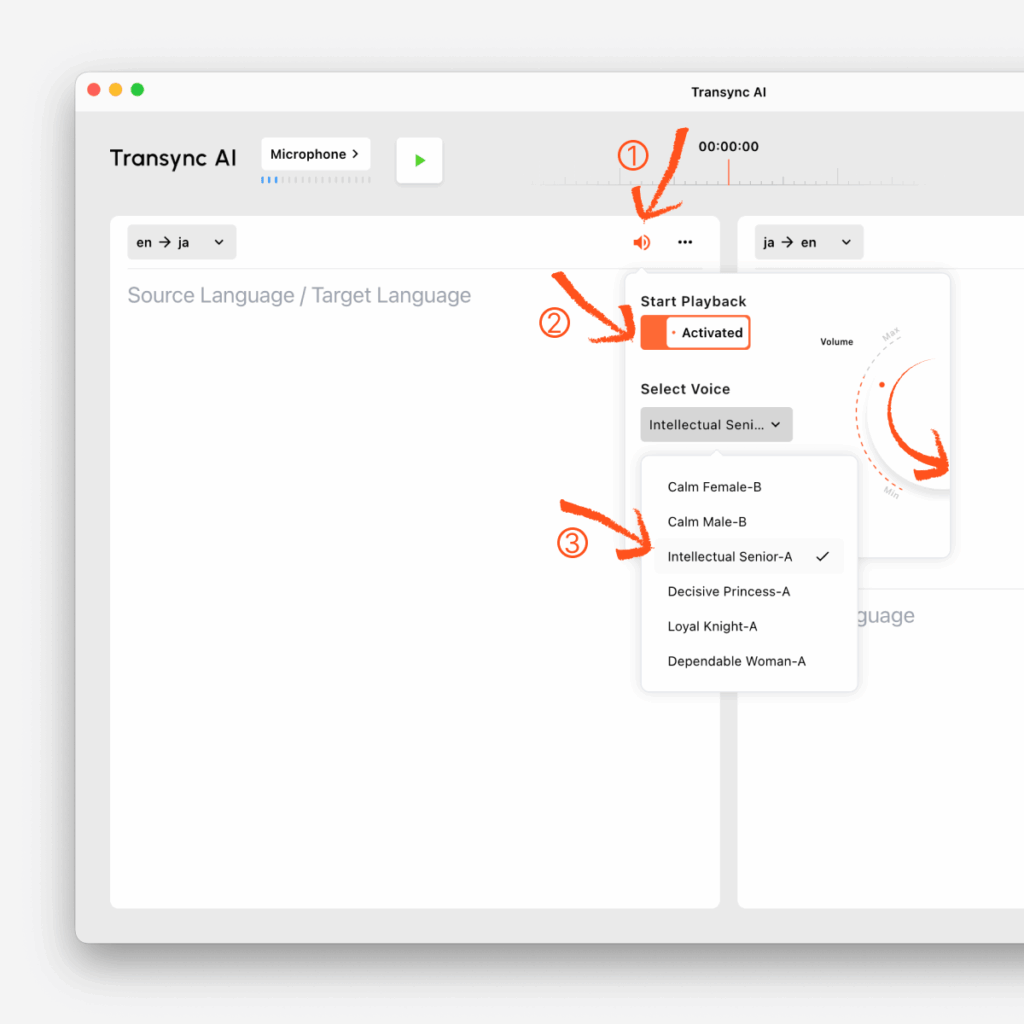
5. Prepare voice playback and Voice Clone if needed #
If translated speech should be heard aloud, configure Voice Playback before the meeting starts. Voice Playback reads translated text aloud with natural TTS, which is useful for meetings, classes, demos, or calls where listening is easier than reading captions.
If your own speaking style matters, you can also enable Voice Clone so translated speech sounds closer to your voice. Voice Clone does not store your recordings for AI training.
- For playback settings, see How to Use Voice Playback in Transync AI
- For cloned voice setup, see How to Use Voice Clone
6. Configure Picture-in-Picture subtitles #
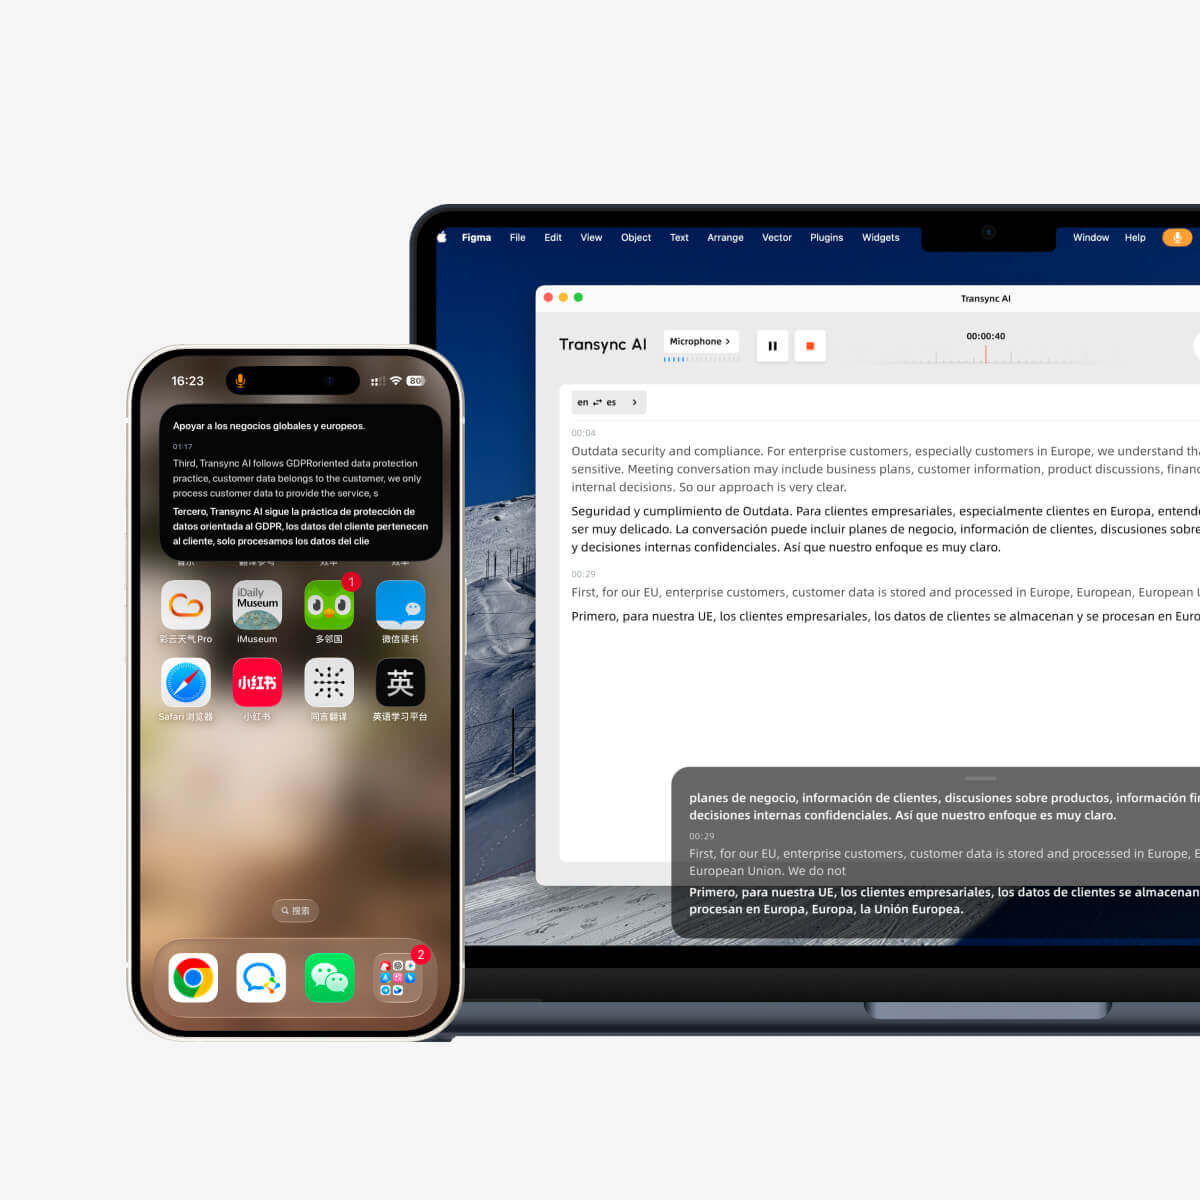
Picture-in-Picture mode keeps bilingual subtitles floating on screen while you view slides, shared screens, documents, videos, or other apps. On desktop, configure the text layout, font size, and transparency before starting a translation task.
- Show original only when you only need the source language.
- Show translation only when you only need the translated result.
- Use mixed view when you want to compare the original and translation together.
- For detailed settings, see How to Use Picture-in-Picture Mode
7. Set up Virtual Microphone when others need translated speech #
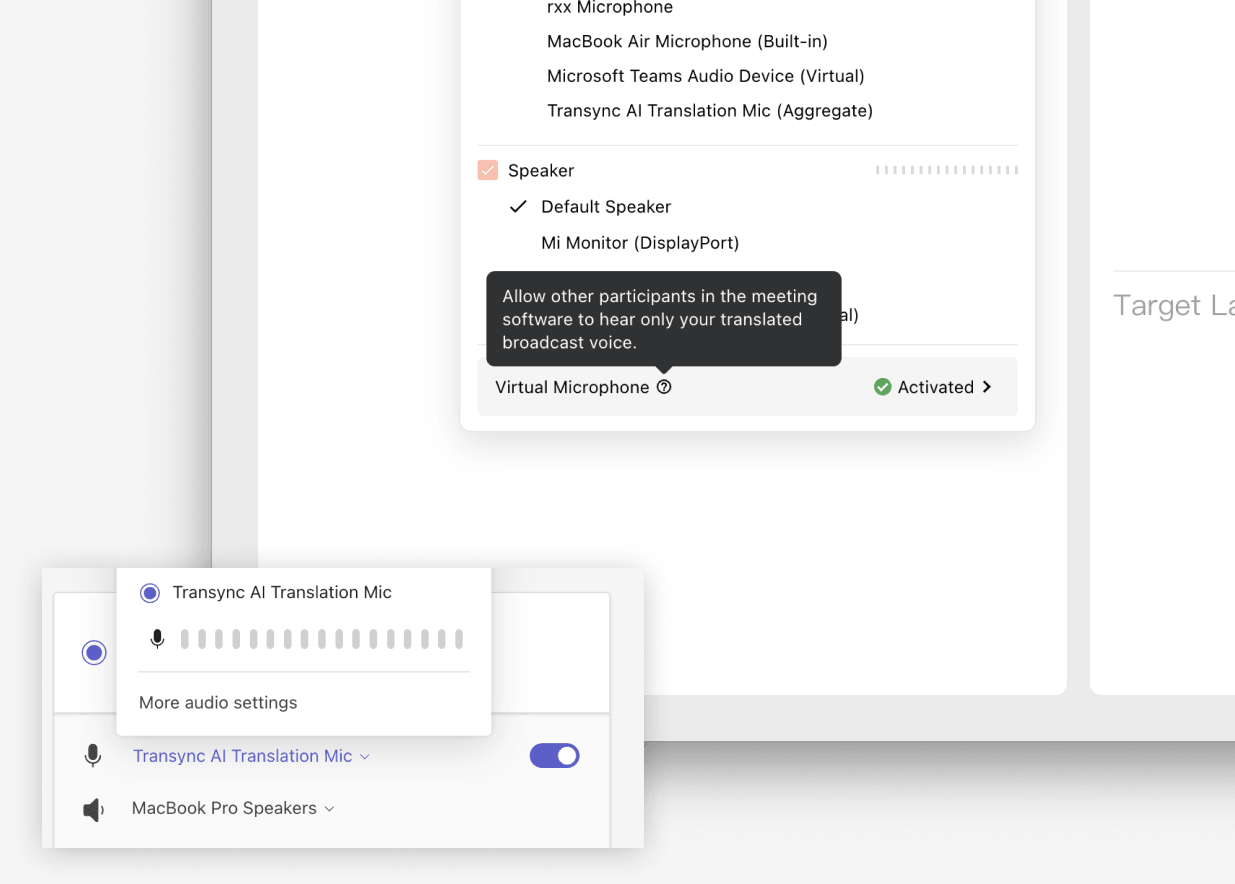
Virtual Microphone is useful when other meeting participants should hear the translated voice directly through your meeting microphone input, not your original speech. Set it up before the meeting, then select the Transync AI virtual microphone or configured virtual audio device inside your meeting app.
- For macOS, follow How to Use the Virtual Microphone on macOS
- For Windows, follow How to Set Up Virtual Microphone on Windows
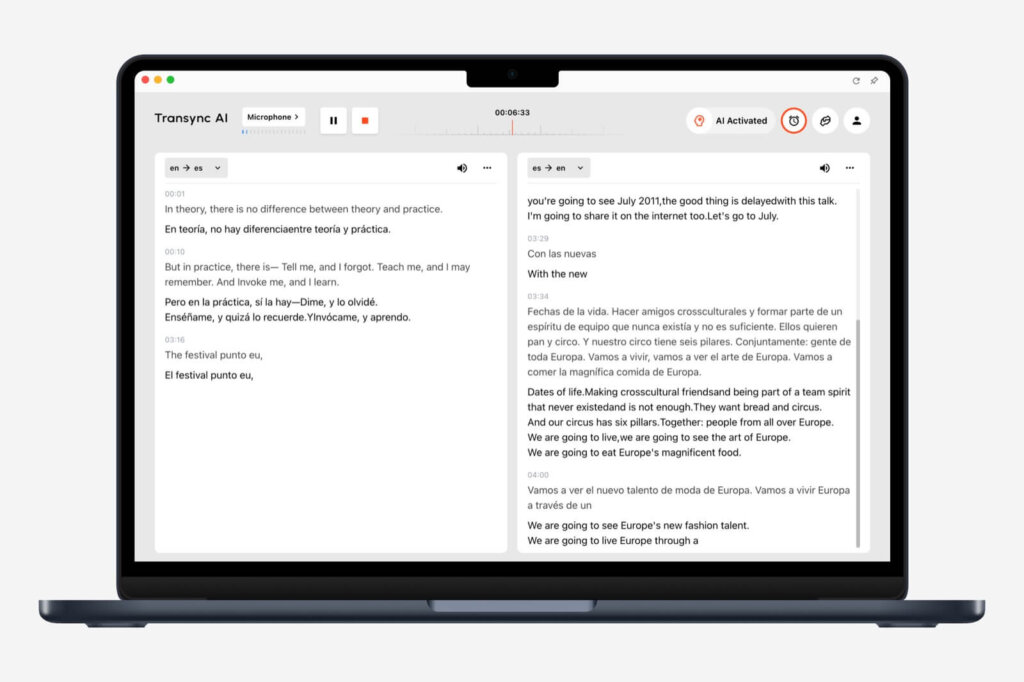
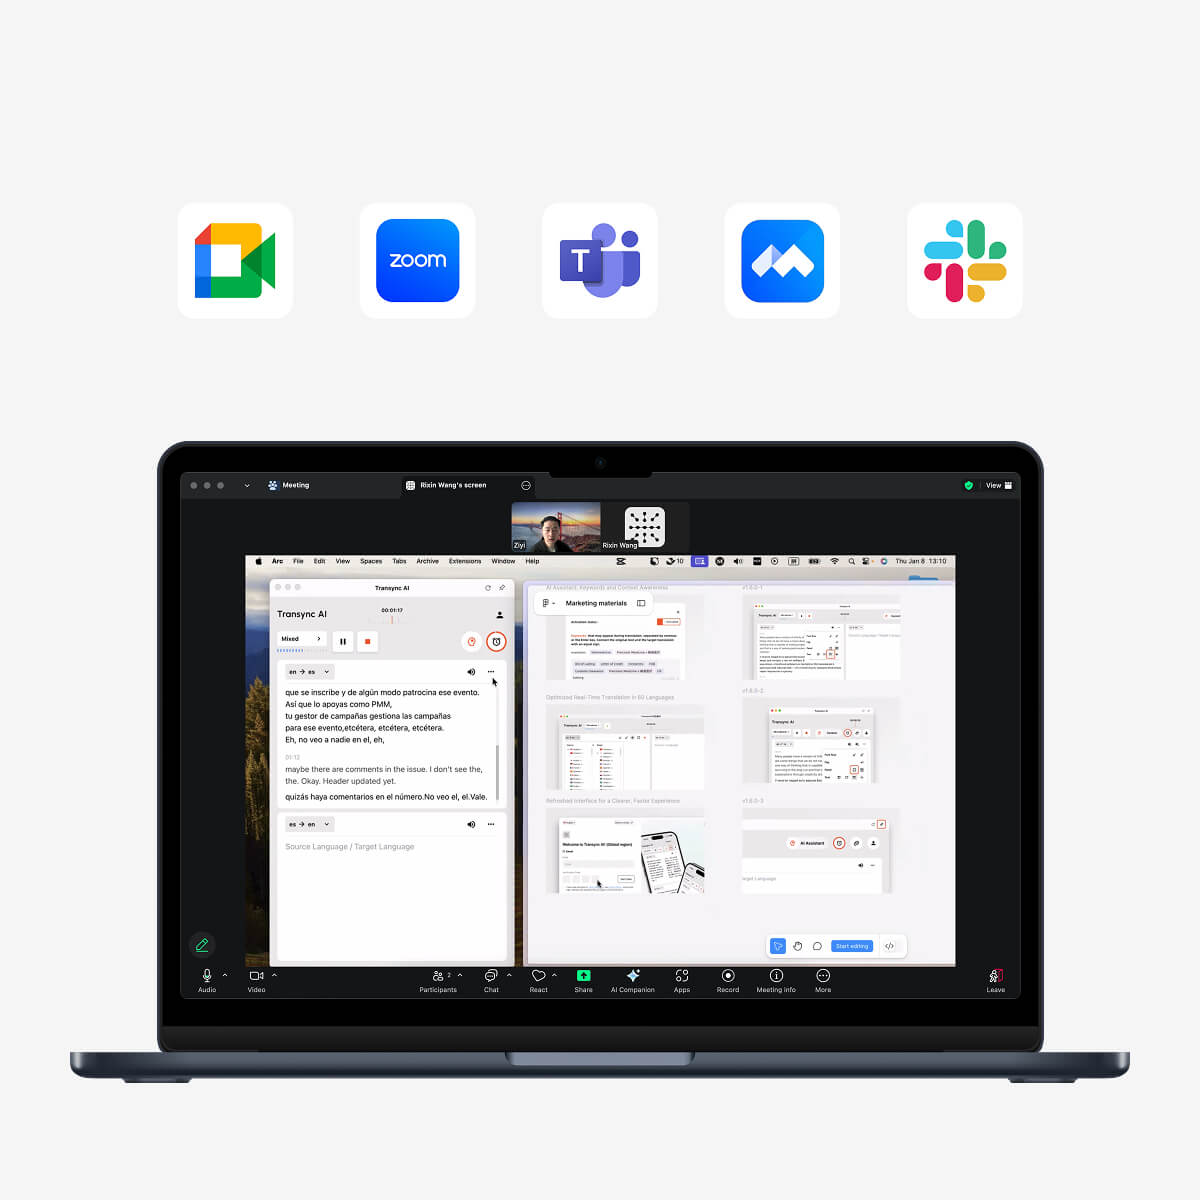
8. Join the meeting and start translation #
After Transync AI is configured, join your meeting in Zoom, Microsoft Teams, Google Meet, or another meeting platform. Confirm that your microphone and meeting audio are working, then click Start Translation in Transync AI.
During the meeting, Transync AI will show the original speech and translated text in real time. Use Pause when you temporarily do not need translation, and Stop when the session is finished.
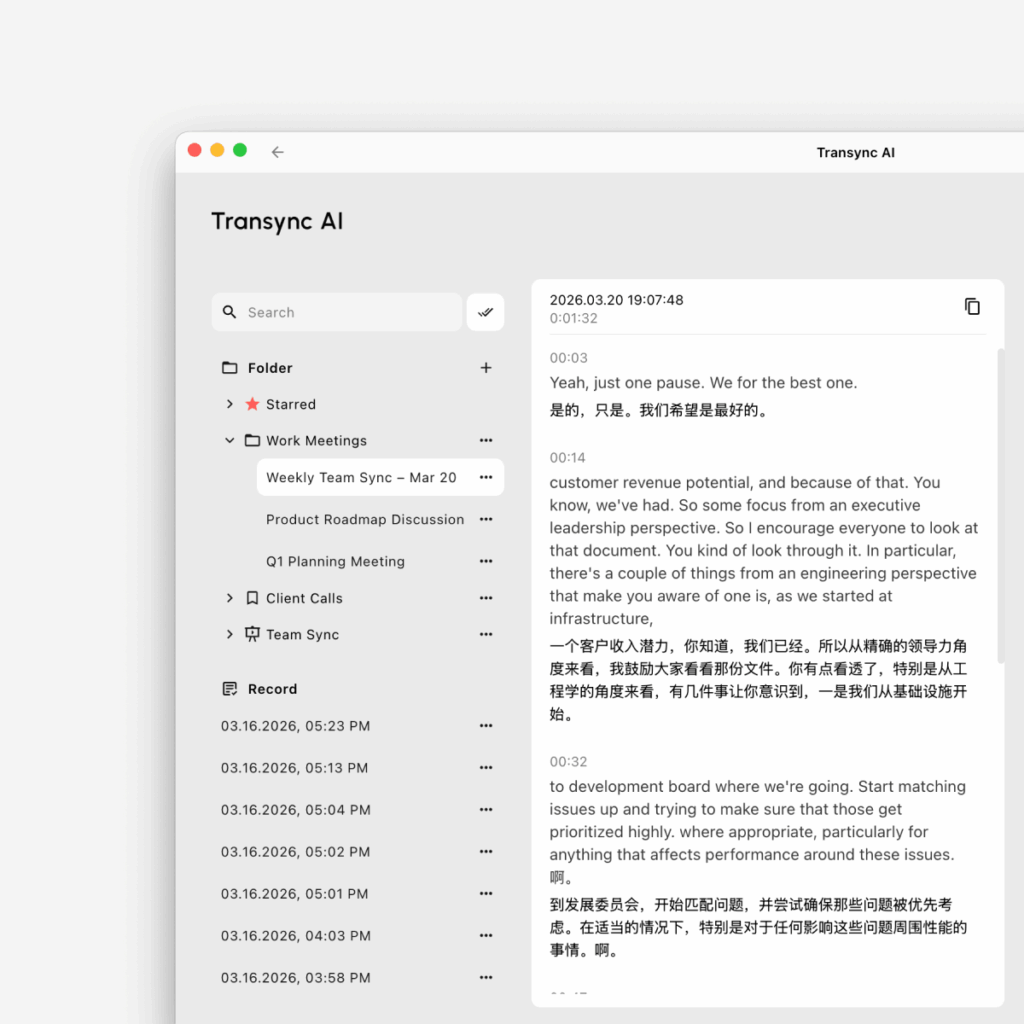
9. Review records, transcripts, and summaries after the meeting #
After a translation session, open your translation records to review what was discussed. Depending on your workflow, you can access transcripts, summaries, and action items to follow up faster.
- Manage saved sessions with How to Manage Translation Records
- Review meeting content with How to Access Meeting Transcripts and Summaries
Recommended desktop setup #
For most desktop meetings, the recommended setup is: open Transync AI first, choose the right translation mode with How to Choose a Translation Mode in Transync AI, select your language pair, add AI Assistant keywords and context when needed, enable Microphone Audio and Computer Audio, configure optional PiP, Voice Playback, Voice Clone, or Virtual Microphone, then join the meeting and start translation. After the meeting, use How to Manage Translation Records to review and organize saved sessions.


