Transync AI lets you manage translation records more easily. You can create folders, rename files, move important records to Starred or other folders, and delete records you no longer need. If you are new to the product, you may want to check our Quickstart or learn how to start real-time translation first.
This feature is useful when you want to:
- quickly identify different meetings or recordings
- mark important records for later review
- organize records by client, project, language, or team
This guide explains how to manage translation records in Transync AI. You can create folders, rename files, move records to Starred or other folders, and delete records you no longer need.
1. Open Translation Records #
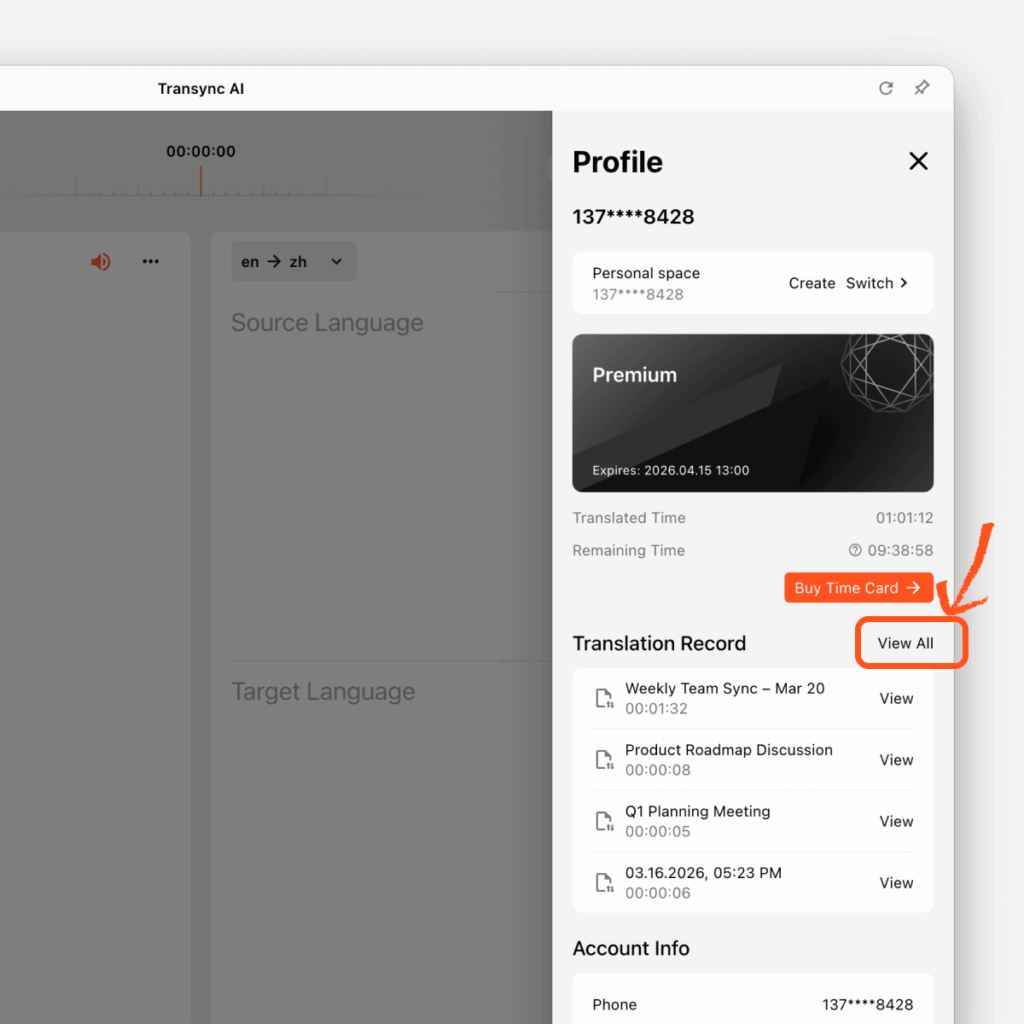
To access all saved translation records:
- Open Profile
- Find the Translation Record section
- Click View All
This will take you to the full Translation Record management page, where you can browse, organize, and manage your saved files.
2. Create a new folder #
You can create folders to organize records by project, meeting type, customer, or team.
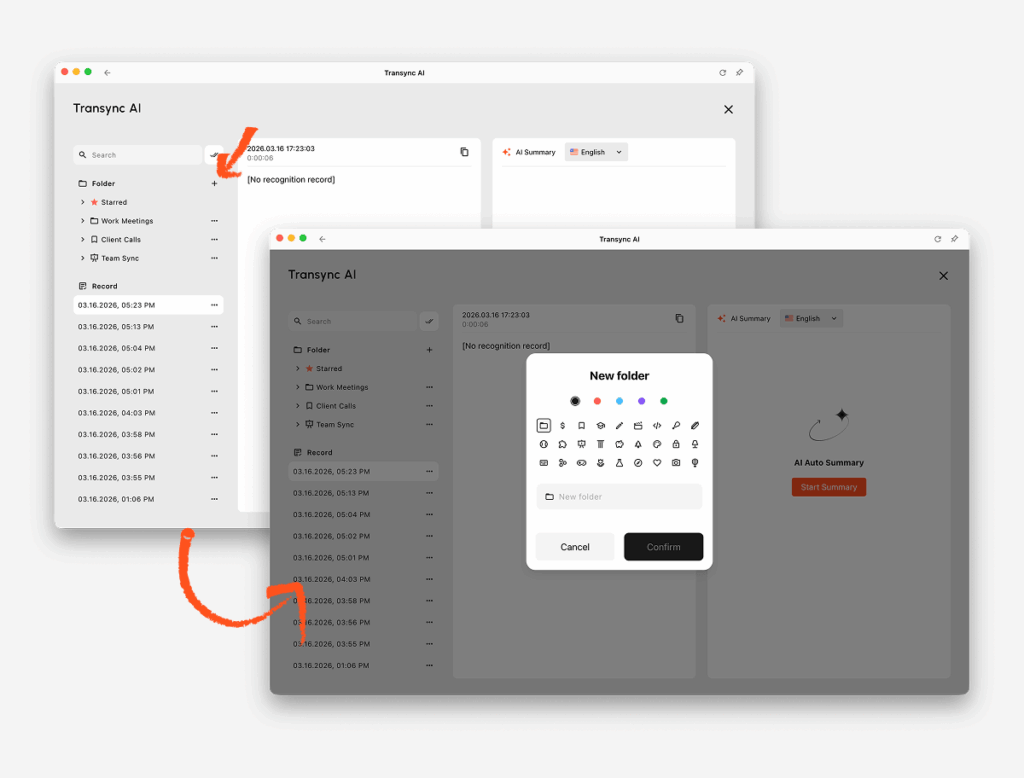
To create a folder:
- In the left sidebar, find Folder
- Click the + button
- Choose a folder icon
- Enter a folder name
- Click Confirm
Your new folder will then appear in the folder list on the left.
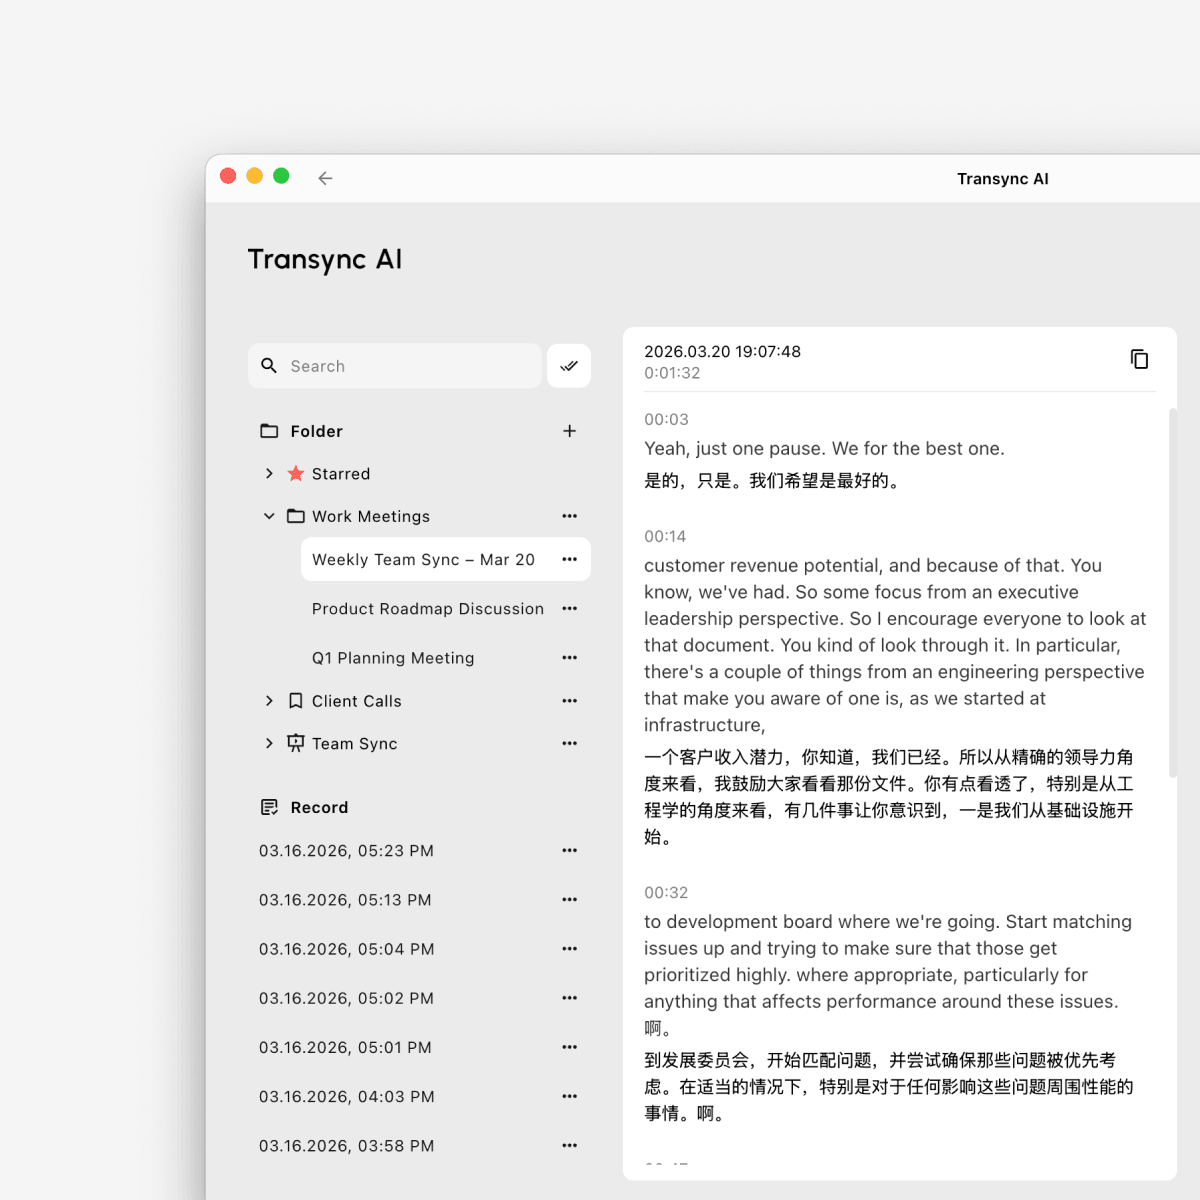
3. Manage a single translation record #
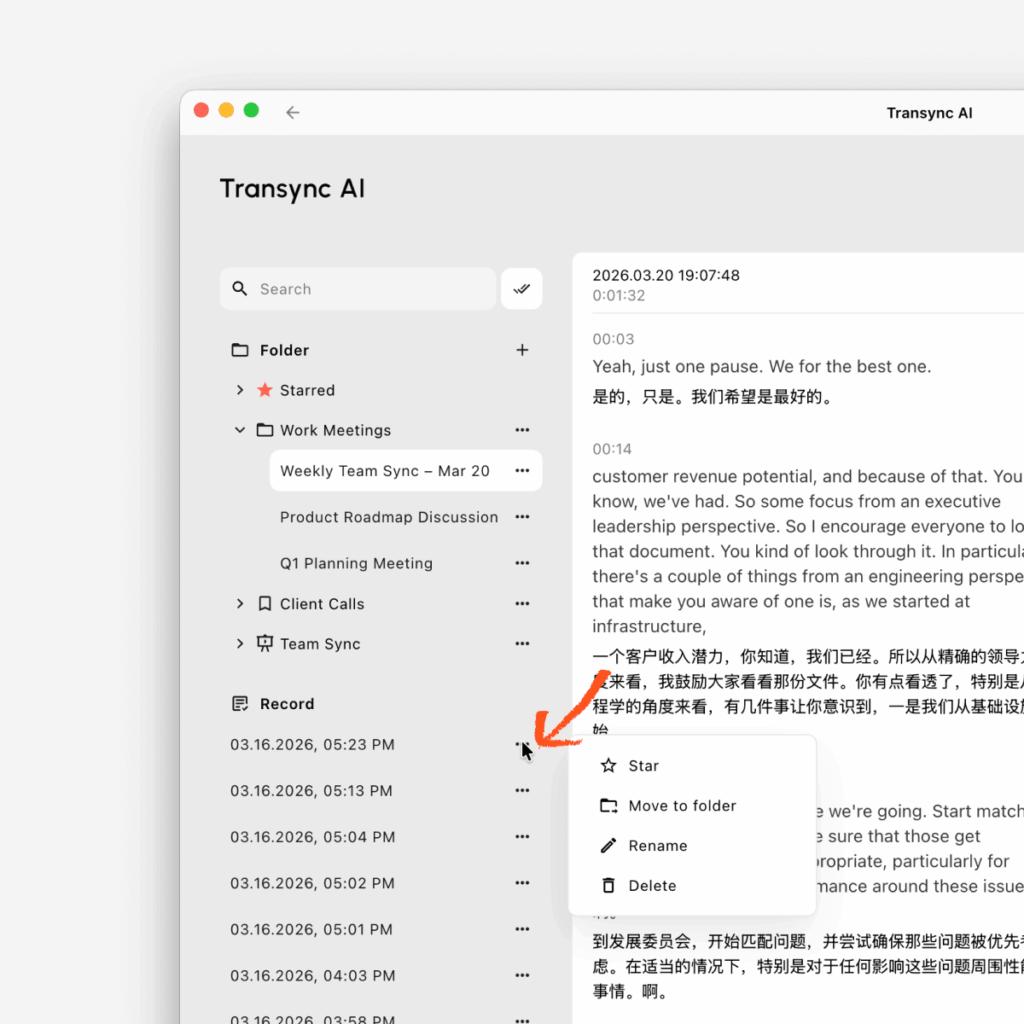
Each translation record has a three-dot menu for quick actions.
To manage a file:
- Find the file under Record or inside a folder
- Click the three-dot menu next to the file
- Choose the action you need
Available actions include:
Delete: remove the file from your records
Star: move the file to Starred for quick access
Move to folder: place the file into one of your folders
Rename: change the file name to make it easier to identify
4. Rename a translation record #
If the default file name is not clear enough, you can rename it.
To rename a file:
- Click the three-dot menu next to the record
- Select Rename
- Enter the new file name
- Confirm the change
A clear name makes it easier to find the record later, especially when you have many saved sessions.
5. Move a record to Starred or another folder #
You can organize important files in two ways:
Move to Starred #
Use Starred for files you want to access quickly.
- Click the three-dot menu
- Select Star
The file will appear in the Starred folder.
Move to a selected folder #
Use folders to group files by topic or workflow.
- Click the three-dot menu
- Select Move to folder
- Choose the target folder
- Confirm
6. Delete a translation record #
If you no longer need a file, you can delete it.
To delete a record:
- Click the three-dot menu
- Select Delete
- Confirm the deletion
Please make sure you no longer need the file before deleting it.
7. Search and manage multiple records in batch #
If you want to manage several records at once, you can use the search and batch edit tools.
To batch manage files:
- Use the Search bar to find the records you want
- Click the Edit button next to the search bar
- Select multiple records
- Choose the action you need
You can batch:
- Star selected files
- Move to folder for selected files
- Delete selected files
This is especially useful when you want to clean up old records or organize multiple files at the same time.

8. Tips to Manage Translation Records Efficiently #
We recommend this workflow:
- create folders for different meeting scenarios
- rename important files after each session
- star records you may revisit soon
- use batch edit to organize multiple files faster
This makes your translation records easier to review, search, and manage over time.


